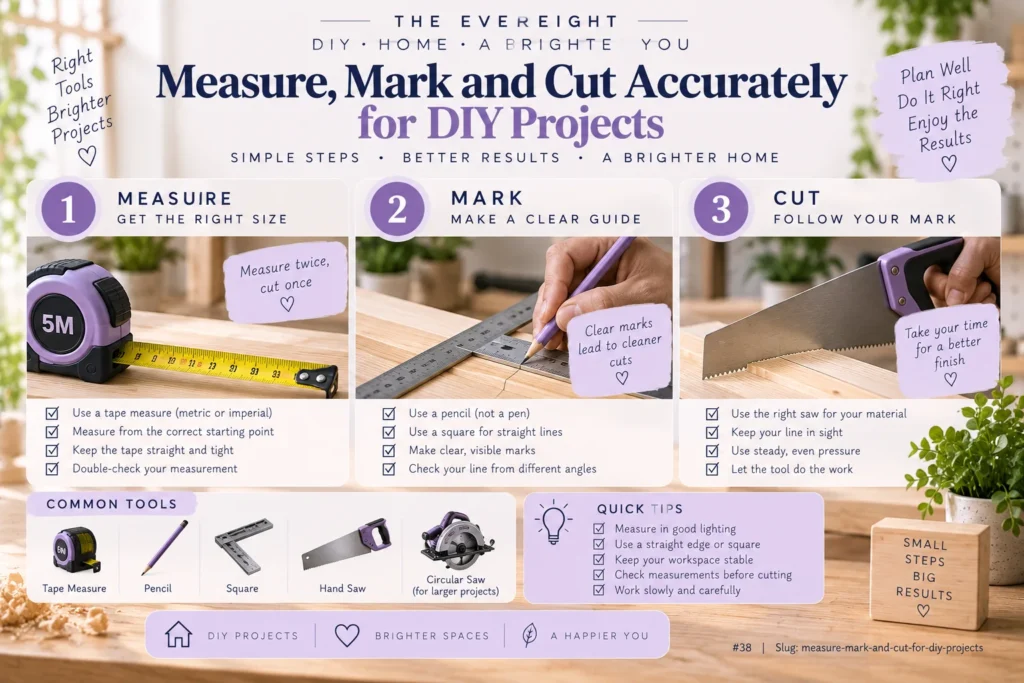
Many DIY mistakes happen before the saw starts.
A board can be cut perfectly along the wrong line. A shelf can be exactly 24 inches long and still not fit because the opening was measured at only one point. Five identical parts can become five different lengths because each was measured from the previous one.
Accuracy is a system. Measure from reliable references, mark clearly, understand which side of the line is waste, account for the cutting tool, and verify before making an irreversible cut.
Quick Answer
Measure the actual space and material, write dimensions down, choose a consistent reference edge, mark with a sharp tool, identify the waste side, and account for the saw kerf. Secure the workpiece, support both the material and offcut appropriately, and make a test cut when setup or fit is uncertain. For repeated parts, use a stop, template, or master reference where safe and appropriate rather than independently measuring every piece.
1. Start With the Finished Dimension
Before touching material, define the dimension the finished part needs to have.
Do not confuse:
- Opening size.
- Outside size.
- Inside size.
- Material cut length.
- Distance between fasteners.
- Clearance.
A storage box that must fit inside a cabinet needs clearance, not the cabinet’s exact internal dimension.
2. Measure the Real Location
Walls, cabinets, floors, and furniture are not always square.
Measure an opening at more than one point.
Check width, height, and depth.
If a shelf fits between two walls, measure front and back.
If a drawer divider fits inside a drawer, check whether the sides taper.
Build for reality, not assumed geometry.
3. Use One Measurement System
Avoid switching between fractions, decimals, metric, and imperial halfway through a project unless you are comfortable converting accurately.
If a plan uses one system, staying within it reduces transcription errors.
When converting, write the converted value down rather than repeatedly calculating it mentally.
4. Use a Consistent Reference Edge
Choose one straight, reliable edge of the material as the reference.
Take related measurements from that edge.
If you measure one hole from the left and another from the right, small material-length differences can change spacing.
Reference-based layout keeps relationships consistent.
5. Keep the Pencil Sharp
A thick line creates ambiguity.
For fine work, use a sharp pencil or another marking tool appropriate to the material.
Mark on the waste side when useful.
Do not use permanent markers on visible finished surfaces unless you know they can be removed.
6. Use a Square for Perpendicular Lines
A tape measure gives distance; it does not guarantee a square cut line.
Use a combination square, speed square, framing square, or another appropriate layout tool.
Hold the square firmly against the reference edge.
Check that sawdust or debris is not trapped between the tool and material.
7. Understand the Kerf
Kerf is the material removed by the saw blade or cutting process.
If you cut directly through the center of your marked line, part of the finished dimension may disappear.
Decide which side is the keeper and which is waste.
Position the blade or cutting path accordingly.
The exact kerf depends on the blade and tool.
8. Mark the Waste Side
A small X on the waste side prevents a common mistake.
It becomes especially helpful when several pieces have similar dimensions.
Before cutting, point to the keeper piece and confirm it remains on the correct side of the blade.
9. Measure Twice – But Measure the Same Thing
Repeating the same wrong measurement twice does not improve accuracy.
On the second check, verify:
- The reference point.
- The dimension.
- The orientation.
- The waste side.
- The material thickness.
- Any clearance.
The second measurement should challenge the first, not merely repeat it.
10. Account for Material Thickness
Boxes, shelves, frames, and furniture often fail because thickness was ignored.
If two side panels sit outside a base, the outside width differs from a design where they sit on top of it.
Measure the actual material thickness; nominal dimensions may not equal actual dimensions.
Use a proven drawing or sketch the assembly.
11. Account for Clearance
Moving parts need space.
Drawers, doors, removable bins, sliding components, and items fitted between walls may require clearance.
The amount depends on the hardware and design.
Follow hardware manufacturer dimensions where relevant.
Do not assume an exact friction fit is desirable.
12. Create a Cut List
For a project with multiple pieces, write:
- Part name.
- Quantity.
- Finished length.
- Width.
- Thickness.
- Material.
- Notes about grain or orientation.
A cut list separates design thinking from cutting. To practice measuring and cutting on manageable builds, see our 12 beginner woodworking projects for your home; start with a simple project and follow suitable safety instructions.
Check the list before starting.
13. Group Identical Parts
If several parts must match, plan them together.
Depending on the tool and setup, you may use a safe stop block, template, or master reference.
Do not stack-cut material unless the tool, blade, support, and procedure are appropriate for it.
Consistency is the goal, not speed.
14. Use a Story Stick for Repeated Layouts
A story stick is a physical strip marked with key positions.
It can transfer shelf heights, hook locations, or repeated spacing without rereading a tape measure.
Because it preserves relationships physically, it can reduce arithmetic errors.
Label it clearly.
15. Test the Setup on Scrap
Before a critical cut, use scrap of similar material when possible.
Check:
- Blade alignment.
- Kerf position.
- Cut quality.
- Tear-out.
- Tool setting.
- Fit.
A test cut is particularly useful with unfamiliar tools or jigs.
16. Support the Workpiece
A cut is not accurate if the material moves.
Use a stable work surface, clamps, guides, or tool-specific support.
Support long material so its weight does not twist the cut.
Keep clamps outside the cutting path.
Never use your body as the primary work support.
17. Support the Offcut Appropriately
An unsupported offcut can fall, tear fibers, pinch a blade, or shift the main workpiece.
Support it in a way that does not close the kerf or create binding.
The correct setup depends on the cutting tool.
Follow the tool manufacturer’s instructions.
18. Let the Tool Reach Operating Condition
For many powered saws, the tool should reach the appropriate operating speed before entering the material, as specified by the manufacturer.
Do not force the cut.
Maintain controlled feed.
Keep the base or guide in proper contact.
The exact procedure varies by saw.
19. Cut on the Correct Side of the Line
The line represents a boundary.
For a keeper piece, preserve the line or cut on the waste side according to your method.
If final fitting is critical, it can be safer to leave a tiny amount for controlled fitting rather than cut too short immediately.
Do not use unsafe freehand “shaving” techniques to correct a small error.
20. Check the First Part Before Cutting the Rest
If you need eight identical pieces, cut one and test it.
Fit it in the actual project.
Only then use it as a reference or confirm the cut setup for the remaining parts.
One early check can prevent eight identical mistakes.
21. Measure Diagonals for Square Assemblies
For a rectangular frame or box, equal diagonals are one useful indication that the assembly is square, assuming opposite sides are correctly dimensioned.
Check before glue cures or fasteners are fully committed.
A square at one corner alone may not reveal a racked assembly.
22. Mark Hardware From a Template
For repeated knobs, pulls, hooks, or shelf pins, use a reliable template or jig.
Test it on scrap.
Confirm orientation before every use.
A template improves consistency only if it is positioned consistently.
23. Avoid Cumulative Measurements
Suppose five hooks need equal spacing.
If you measure each hook from the previous hook, each small error can accumulate.
Instead, measure every position from one common reference point or use a template/story stick.
This principle applies to shelves, slats, holes, and decorative trim.
24. Know When Precision Actually Matters
Not every project needs furniture-grade tolerances.
A decorative wall banner can tolerate more variation than a drawer box.
Choose accuracy appropriate to function.
Over-measuring a forgiving project wastes time; under-measuring a fitted project wastes material.
25. Label Parts
Mark hidden faces with part names such as LEFT, RIGHT, TOP, FRONT, or A/B.
Also mark orientation when grain, pattern, or finished faces matter.
Remove or conceal markings appropriately before finishing.
Part labels reduce assembly confusion.
Common Accuracy Mistakes
Trusting nominal dimensions: Actual material differs.
Using the tape hook inconsistently: Reference changes.
Cutting through the middle of the line: Kerf changes size.
Measuring every repeated part separately: Variation accumulates.
Forgetting clearance: The perfect part cannot move.
Skipping the test fit: Errors reach final assembly.
Using a damaged square or tape: The reference itself is wrong.
Cutting Safety Is Part of Accuracy
Rushing, overreaching, poor support, and awkward body position reduce precision and increase risk.
Keep guards in place.
Use the correct blade and tool.
Secure material.
Keep hands out of the cut path.
Disconnect power as directed for blade changes or adjustments.
Use appropriate PPE and dust controls.
If the setup feels unstable, redesign the setup before cutting.
EverEight Pro Tip
For every critical part, write the finished dimension directly on the keeper piece before cutting. After the cut, measure the finished piece and circle the number if it is correct. That tiny quality-control step prevents an unverified part from quietly entering the assembly.