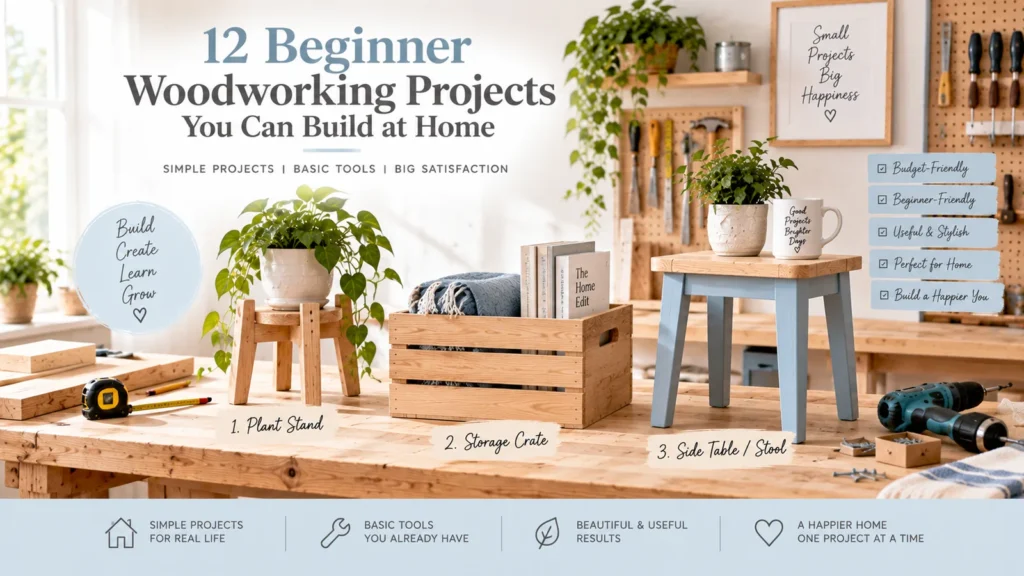
Beginner woodworking is easiest to learn through small projects that repeat a few core skills: measuring, marking, making controlled cuts, drilling pilot holes, fastening, sanding, and finishing.
The goal of a first woodworking project should not be to reproduce complex furniture with limited tools. It should be to understand how wood behaves and how accuracy at one step affects the next.
The 12 projects below progress from simple, mostly freestanding objects toward more demanding builds. They are concepts rather than engineering plans; choose dimensions, joinery, fasteners, and materials based on the actual use and load.
Before You Start
Learn the safety instructions for every tool you use.
Wear appropriate eye, hearing, and dust protection.
Secure workpieces with clamps or another appropriate method rather than holding material near a cutting tool.
Keep guards and safety devices in place.
Avoid loose clothing, jewelry, or hair around rotating machinery.
Do not use a power tool until you understand how to start, stop, and control it.
If you are learning a saw, drill, router, sander, or other powered equipment, practice on scrap before touching the final parts.
Project 1: Simple Wooden Tray
A shallow tray teaches measuring, straight cuts, edge alignment, and finishing.
Use a premade panel or cut a base, then add low sides with suitable joinery.
Keep the tray decorative unless the materials and finish are appropriate for its intended contact with food or hot items.
Skills: Measuring, basic assembly, sanding.
Difficulty: Easy.
Project 2: Drawer Dividers
Removable dividers teach precision.
Measure the drawer at multiple points, cut strips, and use simple notches or a friction-fit layout.
Do not make the fit so tight that seasonal wood movement or small measurement errors damage the drawer.
Skills: Repeated measurement, careful cutting.
Difficulty: Easy.
Project 3: Desktop Pencil and Tool Block
Use a solid block of suitable wood and drill controlled holes for pencils or craft tools.
Clamp the work securely.
Use drill bits appropriate for the hole size and tool, and control drilling depth.
Do not hold the block in your hand while drilling.
Skills: Layout and drilling.
Difficulty: Easy.
Project 4: Small Freestanding Plant Platform
Build a low platform from a top and simple supports.
Design for the actual wet weight of the plant and pot.
Protect wood from moisture using an appropriate finish or barrier.
Keep the platform low and stable.
Skills: Basic assembly, square layout.
Difficulty: Easy.
Project 5: Simple Bookends
Create two stable L-shaped or weighted bookends.
A bookend must resist tipping, so base depth and weight matter.
Keep edges smooth.
Skills: Repeated parts and right-angle assembly.
Difficulty: Easy.
Project 6: Entryway Key Board
Attach hooks to a finished wooden board.
Measure equal spacing and predrill where appropriate.
If wall-mounted, use a mounting method appropriate to the wall and expected load.
Skills: Drilling, layout, finishing.
Difficulty: Easy to moderate.
Project 7: Small Open Storage Box
A basic box teaches how material thickness affects outside dimensions.
Decide whether the sides sit on top of the base or around it before cutting.
Dry-fit the parts.
Skills: Dimension planning, assembly, squareness.
Difficulty: Moderate beginner.
Project 8: Blanket Ladder for Decorative Storage
Build a leaning rack for lightweight blankets.
This is not a climbing ladder.
Use secure joints, smooth all edges, and consider anti-tip restraint.
Do not present the project as safe for body weight.
Skills: Repeated spacing, assembly.
Difficulty: Moderate beginner.
Project 9: Small Freestanding Shelf
A two- or three-level shelf teaches repeated cuts and keeping a carcass square.
Keep the unit low and conservative.
Design for the intended load. Consider tipping, especially around children.
A tall bookcase is not the natural next step from a small shelf; taller furniture introduces greater stability requirements.
Skills: Squareness, repeated dimensions, fastening.
Difficulty: Moderate beginner.
Project 10: Wall-Mounted Coat or Accessory Rail
Attach suitable hooks to a board, then mount the board to appropriate structural support.
This project adds wall-fastening decisions.
Know the wall construction and expected load.
Heavy coats and bags create more load than keys.
Skills: Layout, drilling, wall installation.
Difficulty: Moderate.
Project 11: Simple Picture Ledge
Build a narrow ledge designed for lightweight frames.
The ledge itself may be simple, but wall mounting is the safety-critical part.
Use a proven design and suitable wall attachment.
Keep objects stable and avoid heavy loads.
Skills: Assembly and installation.
Difficulty: Moderate.
Project 12: Small Side Table – Advanced Beginner
A basic side table introduces furniture proportions, leg attachment, racking resistance, and a load-bearing top.
Use a proven beginner plan rather than designing structural joinery by guesswork.
Optional woodworking plans: If you prefer to follow a collection of project plans rather than design each build from scratch, you can explore TedsWoodworking plans here. Review the seller’s current project examples, instructions, materials, pricing and refund terms before buying. We have not independently tested this collection, and its plans are not a substitute for verifying structural safety.
Affiliate disclosure: This TedsWoodworking link is an affiliate link. If you purchase through it, The EverEight may earn a commission at no additional cost to you.
The table should remain stable under expected use.
Do not progress directly to chairs or benches: seating failure can cause injury and requires more confidence in joinery and load design.
Skills: Accurate repeated parts, assembly, squareness, finishing.
Difficulty: Advanced beginner.
Choosing Wood for Beginner Projects
The “best” wood depends on the project, budget, finish, tools, and local availability.
Common softwoods
Often affordable and easy to cut, but some dent easily and can contain knots.
Hardwood
Can provide attractive grain and durability but may cost more and require different cutting effort.
Plywood
Stable sheet material that works well for boxes and panels. Edge appearance may require treatment.
MDF
Flat and smooth for painted projects but heavy, vulnerable to moisture, and produces fine dust when machined. Use appropriate dust controls and fastening methods.
Particleboard
Common in manufactured furniture but less forgiving for many beginner woodworking techniques and edge fastening.
Buy straight, dry material suitable for the project.
Start With Dimensioned Lumber
For early projects, purchasing boards already surfaced and close to final dimensions can reduce the need for jointers, planers, and milling knowledge.
Inspect boards for twist, bow, cup, and damage.
A straight board makes learning easier.
The Basic Beginner Tool Set
Depending on the project:
- Tape measure.
- Pencil.
- Combination or speed square.
- Drill/driver.
- Appropriate bits.
- Clamps.
- Screwdrivers.
- Sanding block or suitable sander.
- A safe cutting method appropriate to the material.
- PPE.
You do not need every woodworking machine.
For help choosing and understanding common hand tools, read our guide to 20 essential hand tools. Choose tools based on the project rather than buying an entire kit at once.
Why Clamps Matter
Clamps hold work while you measure, drill, glue, or assemble.
They are not a substitute for proper joinery, but they can improve control and keep hands away from cutting or drilling zones.
Choose clamps sized for the project.
Do not overtighten delicate material.
Screws vs Nails vs Glue
Each has a role.
Screws provide mechanical fastening and can sometimes be removed.
Nails can be useful in suitable assemblies and trim.
Wood glue can create strong joints when surfaces, fit, clamping, and product instructions are appropriate.
Do not assume glue alone makes every furniture joint safe.
Follow a proven plan for load-bearing projects.
Pilot Holes
Pilot holes can reduce splitting and help guide screws in many situations.
The correct bit size depends on screw and material.
Countersinking may help screw heads sit appropriately.
Practice on scrap before drilling visible parts.
Sanding Basics
Sand to remove machining marks and prepare for the intended finish, not simply until the wood feels soft.
Work through appropriate grit progression.
Avoid over-sanding edges and corners.
Control dust and use respiratory protection appropriate to the material and equipment.
Some wood species and sheet materials can create irritating or hazardous dust.
Finishing Basics
Choose a finish based on the material and use.
Paint, clear finishes, oils, stains, and other products have different preparation, application, ventilation, drying, and disposal requirements.
Follow manufacturer instructions.
Oily finishing materials can present fire hazards if handled or disposed of incorrectly; follow the exact product directions for rag storage and disposal.
How to Keep a Project Square
Measure diagonals on rectangular assemblies where appropriate.
Use a square during assembly.
Clamp carefully.
Check before glue cures or fasteners are fully committed.
A small out-of-square error can become obvious when drawers, doors, or shelves are added later.
Accuracy Before Speed
Do not race a saw.
Mark clearly. Confirm the waste side. Support the material. Let the tool do the work according to its instructions.
If a cut is wrong, stop.
Trying to “shave off a tiny amount” with an unsafe setup is not a beginner correction method.
When to Use a Retailer Cutting Service
Large sheet goods can be difficult to transport and handle.
Having plywood or other sheet material broken down into manageable pieces can make a project safer and easier.
Confirm the service’s expected accuracy; rough breakdown cuts may still require final trimming.
Common Beginner Woodworking Mistakes
Buying warped lumber: Assembly becomes difficult.
Ignoring material thickness: Final dimensions are wrong.
Skipping dry fit: Errors appear after glue.
Not clamping: Work moves during drilling.
Overdriving screws: Material strips or splits.
Sanding without dust control: The workspace and lungs take unnecessary exposure.
Building furniture without a proven plan: Load and stability are guessed.
Starting with a chair: Seating is not an ideal first structural project.
A Safe Skill Progression
Project 1: measure and sand.
Project 2: add drilling.
Project 3: add repeated cuts.
Project 4: build a square box.
Project 5: add wall mounting.
Project 6: use a proven small-furniture plan.
Progress is about adding one variable at a time.
EverEight Pro Tip
Cut one “master” part first when several pieces must match, then use it as a physical reference for marking the others where appropriate. This reduces cumulative measuring differences – but still verify every cut before making it.