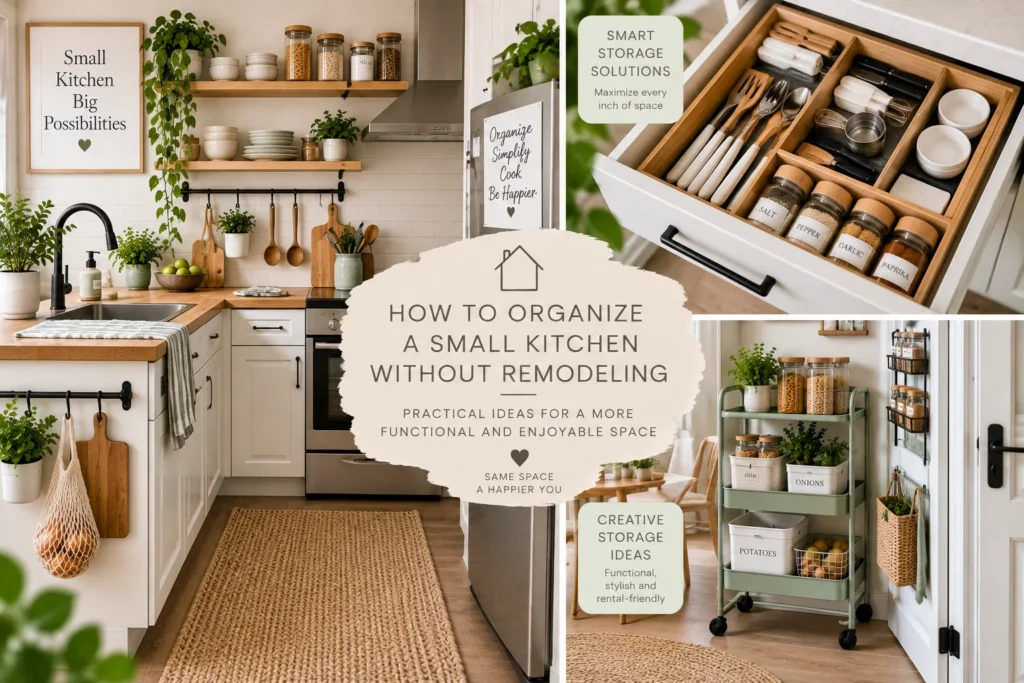
A small kitchen does not need more square footage to become easier to use. Often, the biggest improvements come from changing what occupies prime storage, grouping items around the tasks you perform, and reclaiming vertical or overlooked space.
You do not need to remodel, replace cabinets, or cover every wall with organizers. Start with the way the kitchen functions now. Where do you run out of counter space? Which cabinet requires unloading to reach one pan? What do you repeatedly carry across the room?
This guide focuses on reversible, renter-friendly or low-commitment organization strategies wherever possible.
Quick Answer
To organize a small kitchen without remodeling, reduce duplicate and rarely used items, create simple cooking and food-prep zones, reserve easy-to-reach storage for everyday tools, use cabinet height efficiently, and keep counters limited to appliances you use frequently. Add hooks, risers, dividers, or pull-out bins only where they solve a measured problem.
Step 1: Remove What the Kitchen Does Not Need to Store
Small kitchens struggle when they become storage for every household category.
Remove paperwork, unrelated tools, rarely used décor, bulk household supplies, and objects that have simply migrated to the kitchen. Then review kitchen-specific categories.
Duplicate utensils, damaged cookware, unmatched food containers, excessive drinkware, and appliances you rarely use can consume valuable space.
The goal is not minimalism. It is giving the kitchen enough breathing room to perform its actual jobs.
Step 2: Identify Your Kitchen’s Main Work Zones
A practical kitchen usually includes some version of these zones:
Food preparation: cutting boards, knives, mixing bowls, frequently used ingredients.
Cooking: pans, utensils, oils, seasonings, oven or stovetop tools.
Serving: plates, bowls, glasses, cutlery.
Cleaning: dish supplies, cloths, waste and recycling.
Food storage: pantry ingredients, refrigerator items, containers, wraps.
Your room may be tiny enough that zones overlap. That is fine. The principle is to reduce unnecessary movement.
If you always prepare lunch beside one section of counter, store lunch-making tools and supplies nearby when possible.
Step 3: Protect Your Counter Space
Counter space is working space. Treat it as a limited resource.
Keep appliances out only if their frequency of use justifies the footprint. A coffee maker used every morning may earn permanent space. A large appliance used monthly may not.
Use a tray only if it genuinely contains a working group, such as coffee supplies. Decorative trays can simply create another object to clean around.
Aim to preserve at least one clear preparation area rather than distributing small empty patches between appliances.
Step 4: Make Cabinet Shelves Fit What You Store
Many cabinets waste vertical space because shelf spacing is too generous.
If shelves are adjustable, move them first. This may solve the problem without buying anything.
Where shelves cannot move, a sturdy riser can create a second level for plates, mugs, cans, or short pantry items.
Avoid unstable stacking. Heavy objects should be easy to grip and generally stored lower.
Step 5: Store Pans and Baking Sheets Vertically
Flat cookware often becomes difficult when stacked. The pan you want is always at the bottom.
A secure vertical divider can make baking sheets, cutting boards, trays, and some pans easier to remove individually.
Use a cabinet with enough height and depth, and ensure the divider is stable. Do not force heavy cookware into a lightweight organizer.
Step 6: Simplify the Food-Container Cabinet
Match lids to bases and remove damaged or permanently unmatched pieces.
Nesting containers can save space. Store lids upright in a divider or small bin if that makes matching easier.
Do not keep far more containers than your household can realistically use between wash cycles. A smaller complete set is easier to manage than a cabinet full of mismatched pieces.
Step 7: Use Drawers According to Frequency
The easiest drawer should hold the tools you reach for most often.
Use dividers to stop small utensils from drifting, but avoid creating a separate compartment for every object. Broad categories are faster to maintain.
If a drawer is overfilled, remove duplicate tools before buying a more complex organizer.
Step 8: Use Walls Without Creating Visual Clutter
Wall storage can be valuable in a small kitchen when cabinets are limited.
Secure rails, hooks, magnetic systems, or shelves can hold appropriate lightweight items. Installation must suit the wall and expected load.
Keep wall storage selective. Covering every available surface can make a small kitchen feel more crowded and may complicate cleaning.
Renters should check lease requirements before drilling or permanently mounting anything.
Step 9: Use Cabinet Doors Carefully
The inside of a cabinet door can hold lightweight, shallow items if clearance allows.
Possible uses include measuring spoons, lightweight wraps, cleaning cloths, or small packets.
Close the door slowly during testing. Make sure stored items do not hit shelves, plumbing, or contents. Avoid loading a door beyond what its hardware can safely support.
Step 10: Improve Deep Cabinets
Deep cabinets create false capacity: they hold a lot but make the back difficult to reach.
Use handled bins to pull categories forward. A turntable can work for bottles and jars. In lower cabinets, a properly fitted pull-out organizer may improve access.
Do not automatically fill the full depth. Leaving a little clearance can make storage dramatically easier to use.
Step 11: Reclaim the Space Under the Sink
Under-sink cabinets are awkward because plumbing divides the space.
Start by removing products you do not use. Keep cleaning products in their original labeled containers and store them according to instructions, safely away from children and pets.
Use small bins or a caddy around the plumbing rather than blocking access to pipes and shutoff valves. Never design storage so tightly that a leak would be difficult to notice.
Step 12: Make a Small Pantry Zone
If you need examples of organizers to compare, our pantry organization product guide covers practical options and includes disclosed Amazon affiliate links.
If you do not have a pantry, dedicate one or two cabinets to food.
Group by broad categories and keep frequently used food visible. Use a riser for cans, a narrow bin for packets, or a turntable for bottles only where needed.
Avoid decanting simply to create a matching appearance. Original packaging may be the most space-efficient option and contains important product information.
Step 13: Control Backstock
A small kitchen cannot absorb unlimited bulk purchases.
Create one defined backstock shelf, bin, or nearby storage area. Check it before shopping.
If extras exceed the boundary, use them before buying more. This is particularly effective for canned food, drinks, paper goods, cleaning products, and duplicate condiments.
Step 14: Use the Refrigerator Door and Shelves Intentionally
Refrigerator organization should follow food-safety guidance and the appliance manufacturer’s instructions, not just appearance.
Use clear zones so leftovers and ingredients that need using are visible. Avoid overcrowding to the point that air circulation is affected.
A small “use soon” area can reduce forgotten leftovers.
Step 15: Create a Cooking Kit for Repeated Tasks
If you regularly bake, make coffee, pack lunches, or prepare smoothies, group the supporting items together.
This does not necessarily mean buying a container. It can simply mean storing the coffee filters above the coffee maker or lunch containers beside the wraps.
Task-based storage reduces the number of cabinets opened during a routine.
Step 16: Make the Most of a Narrow Rolling Cart – If It Fits
A slim cart can add movable storage in a kitchen without enough cabinets.
Before buying, tape its footprint on the floor. Make sure it does not narrow a walkway, interfere with doors, or create a tripping hazard.
A cart works best when it has a defined parking place. If it constantly needs to be moved out of the way, it is not solving the space problem.
Step 17: Consider a Freestanding Shelf
Where wall and floor space allow, a narrow shelving unit can hold pantry food, small appliances, or serving pieces.
Choose a stable unit suitable for the load and secure it where required. Keep heavy objects low.
Open shelves need more visual discipline than closed cabinets, so use broad zones rather than many tiny decorative containers.
Step 18: Use the Top of Cabinets Selectively
The space above cabinets can hold lightweight, infrequently used items if it is safe and accessible.
Avoid storing objects that become greasy, dusty, unstable, or difficult to retrieve. Do not place heavy items overhead.
If accessing the area requires unsafe climbing, it is not useful storage.
Step 19: Create a Grocery Put-Away Routine
A kitchen can be beautifully organized and still collapse after one grocery trip.
When groceries arrive, rotate older pantry products forward, place backstock in its defined area, and avoid forcing extras into unrelated cabinets.
If an item has no home, that is a signal: either adjust the system or reconsider how much of that category you buy.
Step 20: Keep One Flexible Space
Do not optimize every inch.
Leave a small section of shelf, drawer, or cabinet with breathing room for temporary needs: a new appliance, holiday ingredients, a bulk purchase you will use quickly, or a change in routine.
A completely packed kitchen has no capacity to adapt.
Small-Kitchen Organization Ideas by Problem
“My counters are always full”
Remove low-use appliances, relocate paperwork, group only true daily-use items, and preserve one clear work zone.
“I cannot find anything in deep cabinets”
Use pull-forward bins or a turntable, place infrequent items behind frequent ones, and stop filling every inch of depth.
“My drawers will not close”
Reduce duplicates first. Then use simple dividers and move rarely used tools to secondary storage.
“I have no pantry”
Dedicate one cabinet, freestanding shelf, or safe nearby cupboard to food and organize it by broad zones.
“My kitchen looks cluttered even when it is clean”
Reduce the number of exposed categories. Keep counters selective and use closed storage for visually busy items.
What Not to Do in a Small Kitchen
Do not buy a countertop organizer that consumes the counter you are trying to free.
Do not add hanging storage where it interferes with cooking, heat, ventilation, doors, or movement.
Do not purchase multipurpose furniture simply because it includes storage. Measure the room first.
Do not keep unsafe stacks because they technically fit.
And do not copy a social-media kitchen whose food, cookware, household size, and routines are completely different from yours.
A One-Hour Small-Kitchen Reset
Spend the first 15 minutes clearing counters and removing items that belong elsewhere.
Use the next 15 minutes to eliminate obvious duplicates and damaged items from one high-friction cabinet.
Spend 15 minutes moving everyday tools into prime storage near their point of use.
Use the final 15 minutes to measure one unresolved storage problem and decide whether rearranging, decluttering, or a specific organizer would fix it.
One focused hour can improve daily function without turning the kitchen upside down.
EverEight Pro Tip
Take a photo of your kitchen while you are actually preparing a common meal. Notice every time you cross the room, move an object to create workspace, or open multiple cabinets for one task. Those movements reveal organization problems that an empty, freshly cleaned kitchen hides.