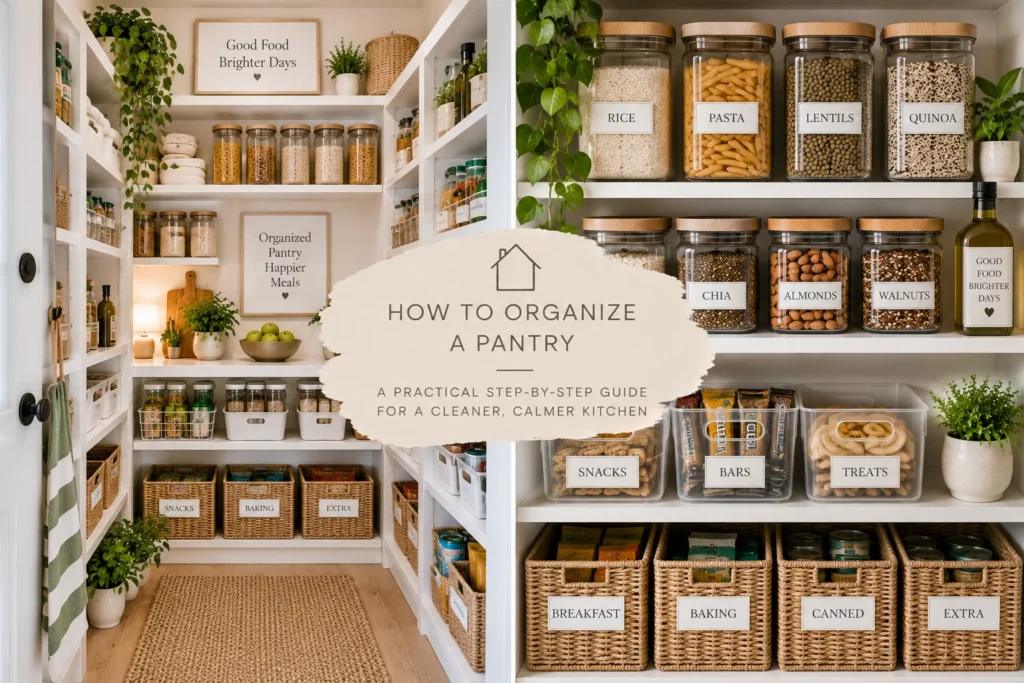
A well-organized pantry makes food easier to find, helps you see what needs using, and can reduce unnecessary duplicate purchases. It does not require rows of identical jars or a walk-in pantry. The same principles work in a cabinet, freestanding cupboard, shelf system, or small food closet.
The most important step happens before labels and containers: deciding what food you actually keep and arranging it around how your household cooks and eats.
This practical guide walks through the process from emptying one manageable section to creating zones, improving visibility, choosing organizers, and maintaining the pantry after grocery day.
Project Overview
Skill Level: Beginner Estimated Cost: Free if you reuse existing containers; optional organizers increase cost Estimated Time: About 1-4 hours depending on pantry size and condition Main Goal: Make food visible, accessible, safe to store, and easy to return to its place
Step 1: Decide Whether to Empty the Whole Pantry
For a small cabinet, emptying everything can be useful. For a large walk-in pantry, it may create unnecessary chaos.
Work shelf by shelf if the project will take more than a few hours. Finish one zone before moving to another.
Create a clear counter or table for sorting and have rubbish, recycling, and donation options ready where appropriate.
Step 2: Check Food Before Organizing It
Review dates, packaging condition, and whether your household will realistically use each item.
Date labels can mean different things depending on the food and jurisdiction, so do not assume every date automatically indicates a safety deadline. Follow local food-safety guidance and manufacturer instructions when deciding whether food is safe to consume.
Discard food with unsafe signs such as damaged or leaking packaging where appropriate. Never taste questionable food to determine whether it is safe.
If unopened, in-date food is unwanted, check whether a local food bank or community organization accepts it and what donation rules apply.
Step 3: Group Similar Foods
Before deciding shelf locations, group items into categories.
Possible categories include:
- Breakfast
- Snacks
- Baking
- Pasta, rice, and grains
- Canned foods
- Sauces and condiments
- Quick meals
- Lunch supplies
- Drinks
- Backstock
Your categories should reflect your household. If you rarely bake, baking does not need a prime shelf. If you prepare packed lunches every weekday, lunch supplies deserve easy access.
Step 4: Count Duplicates and Backstock
Grouping reveals how much you actually own.
If you find five unopened jars of the same product, consider why. Were they hidden? Did multiple people shop without checking? Was the item repeatedly purchased on sale?
Create a backstock zone for unopened extras. Keep it visible enough to check before shopping.
The goal is not to eliminate backstock. It is to prevent extra inventory from hiding among everyday items.
Step 5: Plan Pantry Zones
Assign each category a location before adding organizers.
Place frequently used foods at comfortable reach. Less frequently used supplies can go higher or farther back. Heavy items should generally stay on sturdy lower shelves where they can be handled safely.
If children independently select snacks, an appropriate reachable zone may make sense for your household. Store foods and household products in ways that are safe for the people in your home.
Avoid storing household chemicals with food.
Step 6: Create an “Eat First” Zone
One of the most useful pantry systems is also one of the simplest.
Create a small basket, shelf section, or clearly visible area for food that should be used soon: open packages, short-dated items, or ingredients left from a recipe.
Check this zone when planning meals and snacks.
An eat-first area works only if it remains small. If half the pantry becomes “eat first,” it stops prioritizing anything.
Step 7: Decide What Should Stay in Original Packaging
Decanting food into matching containers can look tidy, but it is not always the most practical choice.
Original packaging may contain:
- Allergen information
- Preparation directions
- Nutrition information
- Lot or batch details
- Best-before or use-by information
- Manufacturer contact information
If you transfer food, preserve any information you may need and use containers suitable for food storage. Label the contents clearly and, where useful, record relevant dates.
Do not mix a new product into an old container without considering cleaning, allergens, freshness, and traceability.
Step 8: Use Clear Containers Selectively
Clear containers can help with frequently used dry staples because you can see quantities at a glance.
They are most valuable when original packaging is awkward, tears easily, or makes stock levels difficult to see.
Measure shelf height and depth before purchasing. Square or rectangular containers often use shelf space efficiently, but the best choice depends on your pantry.
You do not need to decant individually packaged snacks, cans, jars, or every ingredient simply for visual consistency.
Step 9: Use Bins for Loose Categories
Bins are useful when several small packages belong together.
A snack bin can contain bars and packets. A baking bin can hold decorations and small ingredients. A lunch bin can keep portable items together.
Avoid enormous deep bins that hide products at the bottom. Shallow or appropriately sized containers usually improve visibility.
Label opaque bins. Clear bins may not need labels unless multiple categories look similar.
Step 10: Use Turntables Where Access Is the Problem
A turntable can be helpful for bottles, jars, oils, or condiments in deep corners.
It is less useful for rectangular boxes or very heavy products. Measure both the shelf and the turntable’s usable surface.
Test whether rotation actually improves access before buying several.
Step 11: Use Shelf Risers Where Height Is Wasted
Pantry shelves often have more vertical clearance than a row of cans or jars requires.
A stable shelf riser can create a second level and make shorter items visible. Tiered risers can help with cans and spices where the shelf dimensions suit them.
Do not overload risers or create unstable stacks. Follow product load guidance.
Step 12: Make Cans and Jars Visible
Arrange canned goods so labels can be read without removing several items.
You can group by type – vegetables, beans, soups, tomatoes, fish, or meal components – based on what you buy.
Avoid stacking cans to unsafe heights. A tiered organizer is optional; simple rows can work if the shelf is shallow enough.
Step 13: Organize Snacks for Real Life
Snack organization should make choices visible without creating unnecessary work after every grocery trip.
Remove bulky outer boxes only if individual packages retain the information you need and doing so makes sense for your household. Otherwise, simply group snack types together.
For a family, separate lunchbox items from at-home snacks if that reduces weekday searching.
Step 14: Create a Baking Zone
Store flour, sugar, leavening agents, decorations, extracts, and other baking ingredients together if you bake regularly.
Frequently used staples can be decanted into food-safe containers if helpful. Less-used ingredients may be easier to keep in their original packaging inside a bin.
Review this category periodically because small packets and specialty ingredients can accumulate unnoticed.
Step 15: Create a Quick-Meal Zone
A quick-meal section can make busy evenings easier.
Group shelf-stable components that commonly become meals: pasta and sauce, grains, canned ingredients, or other household staples.
This is not about buying special “meal kit” products. It is about making ingredients you already use easy to see together.
Step 16: Handle Spices Separately
Spices are small, easy to duplicate, and difficult to see in deep cabinets.
Choose a system based on your storage: tiered shelves, a drawer, a turntable, or a shallow rack. Keep labels readable.
Avoid automatically replacing all spice jars with matching containers. Transferring spices takes time and may make date or product information harder to track unless you label carefully.
Step 17: Label Only What Needs Labels
Labels are most useful for:
- Opaque containers
- Similar-looking dry goods
- Broad pantry zones
- Backstock
- Foods removed from original packaging
Do not label so specifically that every grocery purchase requires reorganizing the pantry.
A flexible label such as “snacks” may work better than six permanent subcategories.
Step 18: Build Grocery Shopping Into the System
A pantry stays organized when shopping habits support it.
Before shopping, check backstock and the eat-first area. Keep a running grocery list so empty items are recorded when they run out rather than remembered later.
Avoid buying a large quantity solely because a product is discounted unless you know you will use it and have appropriate storage space.
Step 19: Use First In, First Out
When adding new groceries, move older versions forward and place newer ones behind when practical.
This simple rotation helps prevent forgotten products from remaining at the back of shelves.
You do not need to perform a full inventory every week. A few seconds of rotation during grocery put-away is usually enough.
Step 20: Give the Pantry a Five-Minute Weekly Reset
Once a week, quickly return misplaced items, check the eat-first zone, identify anything running low, and wipe obvious spills.
A short reset prevents the system from deteriorating and is much easier than reorganizing the pantry from scratch every few months.
Pantry Organization for Small Spaces
When food storage is limited, prioritize visibility over elaborate categories.
Use shelf height efficiently, keep backstock modest, and avoid large organizers that consume more room than they save. The inside of a suitable pantry door can sometimes hold lightweight items if an organizer fits safely.
In deep cabinets, avoid filling the entire depth with unrelated products. Use a pull-out bin or group backstock behind the active item so you know what is there.
Pantry Organization on a Budget
Start with no-cost improvements: grouping, rotating, reducing duplicates, and assigning zones.
Reuse sturdy baskets or containers you already own when suitable. Small cardboard boxes can temporarily test whether a bin-based system works before you spend money.
If you buy organizers, purchase them one problem at a time. A shelf riser that makes twelve cans visible may be more valuable than a complete matching container set.
Common Pantry Organization Mistakes
Buying organizers first: You may buy the wrong sizes or too many containers.
Decanting everything: This can add maintenance and remove useful package information.
Creating categories that are too narrow: The pantry becomes difficult to maintain after normal grocery trips.
Ignoring backstock: Extras become hidden duplicates.
Using deep bins without visibility: Food disappears at the bottom.
Prioritizing appearance over access: A beautiful pantry that requires moving three containers to reach breakfast is not well organized.
Forgetting household habits: The system needs to work for the people who actually use the pantry.
Pantry Safety Basics
Keep food-storage areas clean and dry. Follow package storage instructions. Keep chemicals and non-food hazardous products away from food.
Use sturdy shelving appropriate for the load and place heavy items where they can be retrieved safely. Clean spills promptly, particularly when they could attract pests.
If you suspect food spoilage, contamination, or pest activity, follow appropriate food-safety guidance rather than relying on appearance alone.
Do You Need Matching Pantry Containers?
No. Matching containers can create a cohesive appearance, but they are not required for an organized pantry.
A functional pantry lets you see what you have, retrieve it easily, know where it goes back, and use food before it is forgotten.
If matching containers also accomplish those goals and fit your budget, they can be worthwhile. If they create extra transferring and labeling work, keep the packaging.
EverEight Pro Tip
Before buying pantry organizers, photograph each shelf after you have grouped the food but before adding containers. Mark the exact access problem in the photo – “can’t see cans in back” or “snack packets fall over.” Buy only the organizer designed to solve that named problem.