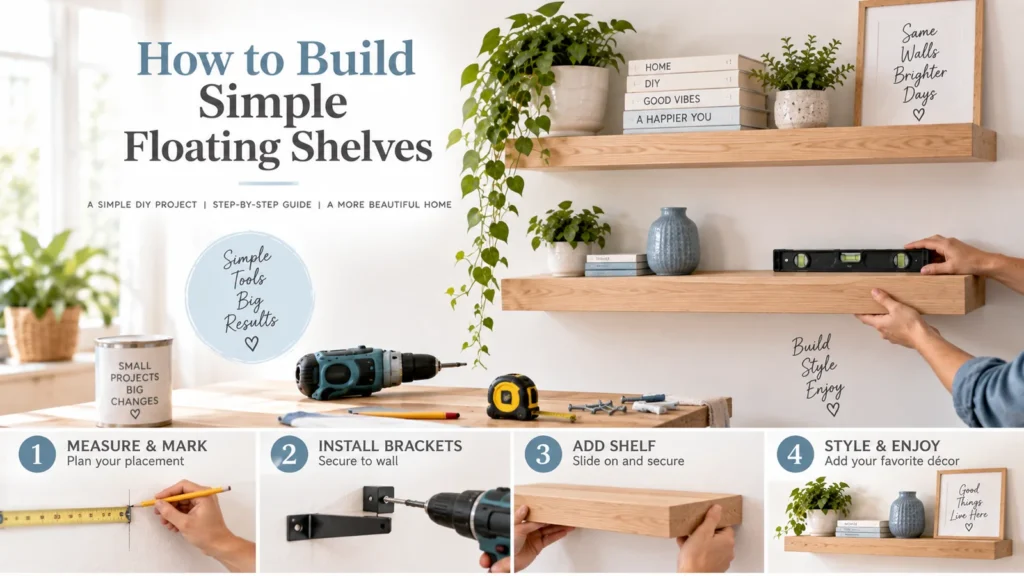
Floating shelves look simple because the support hardware is hidden. That hidden support is exactly why the project deserves more planning than an ordinary decorative board.
A floating shelf is a load-bearing wall installation. Its safety depends on the shelf construction, bracket system, fasteners, wall structure, installation accuracy, and what you place on it.
For beginners, the safest approach is not to invent a hidden bracket from random hardware. Use a proven shelf-and-bracket system with clear manufacturer installation and load guidance, then adapt the appearance around that system.
Quick Answer
Choose a commercially designed floating-shelf bracket or a proven shelf plan rated for the intended load. Identify the wall construction and hidden utilities, follow the bracket manufacturer’s fastening instructions, measure and level carefully, and keep the planned load well within the verified capacity. If the shelf will hold heavy objects, sit above a bed or seating area, or requires uncertain anchoring, get appropriate professional help.
Step 1: Decide What the Shelf Will Hold
Start with the load, not the wood.
A shelf for two lightweight frames is different from one for books, dishes, plants, or audio equipment.
List the objects and estimate their combined weight, including the shelf itself.
Consider future behavior. If the shelf is deep enough to become general storage, someone may eventually place heavier objects on it.
Design for realistic use.
Step 2: Choose the Location
Check:
- Shelf width.
- Shelf depth.
- Clearance from doors and windows.
- Nearby switches, outlets, plumbing fixtures, and vents.
- Head clearance.
- Whether people sit or sleep below it.
- Whether children could climb or pull on it.
Avoid locations where failure would have especially serious consequences unless the installation is appropriately engineered.
Step 3: Identify the Wall Construction
Common walls may include drywall over wood or metal framing, plaster systems, masonry, concrete, tile over a substrate, or other assemblies.
Fastening methods differ.
Do not assume a wall anchor rated for one material performs the same in another.
If you cannot confidently identify the wall, investigate before drilling.
Step 4: Consider Hidden Utilities
Walls can contain electrical wiring, plumbing, gas lines, low-voltage cables, and other services.
Use appropriate detection methods and knowledge of the building layout.
Detection tools have limitations and are not a guarantee.
Do not drill blindly near likely service routes. If the location is uncertain, move the shelf or get qualified help.
Step 5: Select a Proven Floating-Shelf System
For a beginner, a matched system reduces uncertainty.
Look for:
- Clear installation instructions.
- Stated compatible wall conditions.
- Fastener guidance.
- Shelf dimensions.
- Bracket dimensions.
- Load information with installation conditions.
- Required stud or masonry attachment.
- Hardware included or specified.
Load claims only apply when the installation matches the conditions under which the system was rated or tested.
Step 6: Decide Whether to Buy the Shelf or Build the Sleeve
Some floating systems include both bracket and shelf.
Others provide a metal bracket onto which you build or fit a wooden sleeve.
If building the shelf body, follow the bracket manufacturer’s dimensional requirements. The fit between bracket and shelf affects stability.
Do not make the shelf thinner, deeper, or longer than the system supports merely for appearance.
Step 7: Gather Tools
Depending on the wall and system, you may need:
- Tape measure.
- Pencil.
- Level.
- Appropriate detector/stud-finding method.
- Drill/driver.
- Drill bits compatible with the wall and fasteners.
- Screwdriver.
- Square.
- PPE appropriate to drilling/cutting.
- Vacuum or dust-control method.
Masonry, tile, and other hard surfaces may require different bits and techniques.
Step 8: Read the Installation Instructions Before Marking
Bracket systems vary.
Some require attachment to multiple studs. Some are designed for masonry. Some use specific anchors.
Do not substitute fasteners casually.
Read the full sequence before creating holes.
Step 9: Establish a Level Reference Line
Measure the desired shelf height from a consistent reference.
Use a reliable level to draw or mark the bracket line.
Do not assume ceilings, floors, counters, or nearby trim are perfectly level.
If visual alignment with another feature matters, decide whether true level or visual alignment is the priority without compromising safe installation.
Step 10: Locate Required Structural Attachment Points
If the system requires studs, locate and verify them using appropriate methods.
Stud spacing and construction vary.
Mark the centers where possible.
For masonry, identify the substrate and follow the bracket/fastener guidance.
Do not use a drywall-only anchor when the system requires structural attachment.
Step 11: Mark the Bracket Holes
Hold the bracket on the reference line.
Mark each required hole.
Check level again.
If the bracket is long, support it while marking so it does not rotate.
Before drilling, perform one final hidden-utility check.
Step 12: Drill Pilot or Anchor Holes as Directed
Use the bit type and diameter specified for the fastener and substrate.
Keep the drill controlled and perpendicular where required.
Wear eye protection and manage dust.
Tile drilling, masonry drilling, and other specialty conditions may be inappropriate for a first project without additional guidance.
Step 13: Attach the Bracket
Install the specified fasteners.
Tighten evenly according to the system instructions.
Do not overtighten to the point of crushing drywall, stripping threads, or damaging the bracket.
Check that the bracket is secure and level before adding the shelf.
Step 14: Fit the Shelf
Slide or attach the shelf body according to the system.
Some shelves use retaining screws or other mechanisms to prevent movement.
Do not omit those components because they are hidden.
Check for wobble.
Step 15: Test Before Loading
Do not immediately add the maximum advertised load.
Inspect the bracket, fasteners, wall surface, and shelf fit.
Add intended lightweight objects gradually.
If anything shifts, cracks, pulls away, or feels unstable, remove the load and investigate.
Do not “test” a shelf by hanging your body weight from it.
Step 16: Style With Load in Mind
Spread weight appropriately rather than placing the heaviest object at the unsupported outer edge.
Keep fragile objects away from edges.
Consider water from plants, heat from electronics, and vibration from speakers.
The shelf is part of the room, not just a load number.
How Deep Should a Floating Shelf Be?
Depth depends on the bracket system and intended use.
Deeper shelves create more leverage on the wall connection.
Do not extend shelf depth beyond what the bracket system or proven plan supports.
For decorative items, a shallower shelf may be both visually lighter and structurally easier.
How Long Should a Floating Shelf Be?
Length is also system-dependent.
A longer board can flex and may require more support points.
Follow the bracket or plan’s supported span.
If you need a long shelf, consider multiple brackets, a different shelf system, or conventional visible supports.
Solid Wood vs Plywood vs Engineered Board
Material affects weight, stiffness, fastening, finish, and movement.
Solid wood can move with humidity. Plywood can be stable and strong for its thickness. MDF can create a smooth painted surface but is heavy and behaves differently around moisture and fasteners.
The bracket design must be compatible with the shelf material.
Do not select material solely by appearance.
Floating Shelf Above a Desk
Consider monitor height, head clearance, equipment ventilation, and the consequence of objects falling onto electronics or a person.
Keep heavy items conservative.
A conventional shelf with visible brackets may provide more obvious support for heavier office storage.
Floating Shelf in a Kitchen
Kitchen shelves may hold dishes, jars, or appliances – often much heavier than décor.
They also face moisture, grease, and frequent loading.
Use a system specifically appropriate for the intended weight and environment.
If the shelf will carry substantial dishware, professional installation or a more conventional support system may be prudent.
Floating Shelf in a Bathroom
Humidity and splashes affect materials and finishes.
Wall construction may also conceal plumbing.
Use moisture-appropriate materials and be especially cautious about drilling near fixtures.
Floating Shelf in a Rental
Check lease rules before drilling.
Removable adhesive systems should not be assumed equivalent to structural floating-shelf brackets.
If the shelf needs meaningful load capacity, use an approved installation method or choose freestanding storage.
When Floating Shelves Are Not the Best Choice
Choose visible brackets or freestanding furniture when:
- The wall construction is uncertain.
- The intended load is heavy.
- The shelf is very deep.
- You need a long span.
- The installation location is high-consequence.
- You cannot access required structural attachment.
- Rental rules prohibit appropriate fastening.
Visible support is not a design failure.
Common Floating-Shelf Mistakes
Choosing appearance before load: The bracket cannot support the intended use.
Using random anchors: Ratings and substrates do not match.
Ignoring hidden utilities: Drilling creates serious risk.
Making the shelf too deep: Leverage increases.
Skipping retaining hardware: The shelf can slide.
Assuming a stud finder is infallible: Detection has limitations.
Overloading with books or dishes: Real loads exceed the decorative plan.
Safety Checklist Before You Finish
- Correct wall type identified.
- Hidden-utility risk considered.
- Manufacturer instructions followed.
- Required structural attachment achieved.
- Correct fasteners used.
- Bracket level and secure.
- Shelf properly retained.
- Intended load within verified capacity.
- No wobble or wall damage.
- Location appropriate for falling-object risk.
If any answer is uncertain, stop before loading the shelf.
EverEight Pro Tip
Before buying a floating-shelf kit, put the objects you intend to display in a box and weigh the box. Add the expected shelf weight, then shop for a system whose verified installation conditions comfortably accommodate that real-world load.